Polar Alignment – simple guide
This is just a simple guide on setting up your SkyWatcher EQ5 / EQ6 / NEQ6 Pro mounts. Though the methodology involved can help to set up non SkyWatcher equatorial mounts also.
Tools required:
spirit level
compass
brute strength for lifting the mount outside
a delicate touch for setting scales
a permanent marker pen (optional)
access to a pc or tablet (android or IOS) to download a small and free program called Polarfinder
A pc version is here
Below is the SkyWatcher NEQ6 Pro mount which I am using for this tutorial
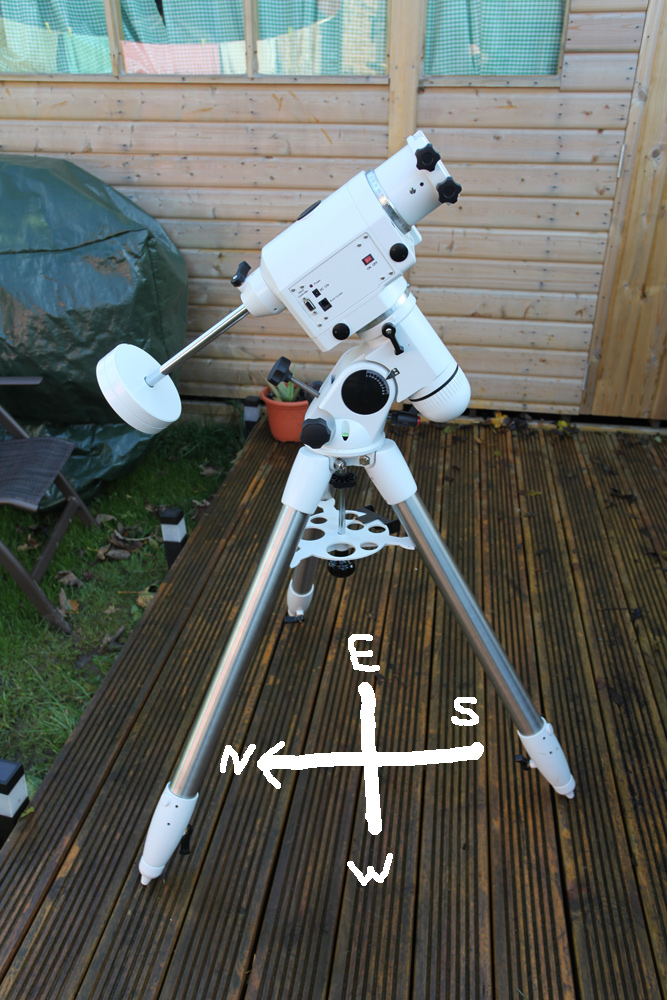

Now on the EQ5/NEQ5 mount the leading tripod leg points to the north. On my NEQ6 mount the trailing leg points south with North somewhere between the two front legs. Oh, that isn’t paint work on the decking by the way !!
First thing to do is to set up your tripod and mount as above initially without any of the legs extended (it will be at its most sturdiest). Then look at the little bubble level on your mount (assuming it has one)
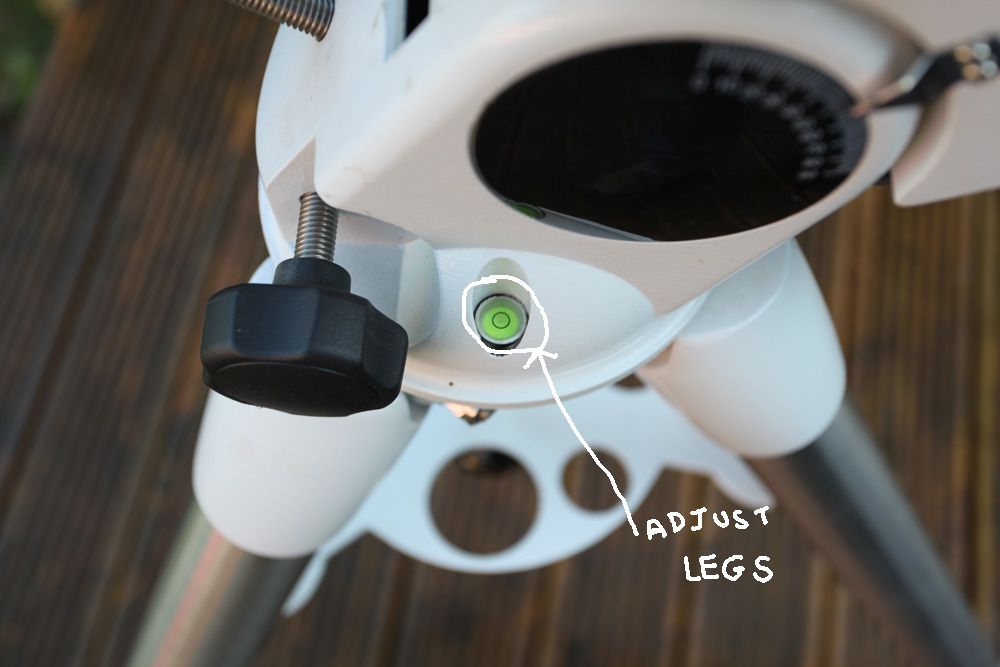

If you do not have to adjust your legs then you are off to a good start.
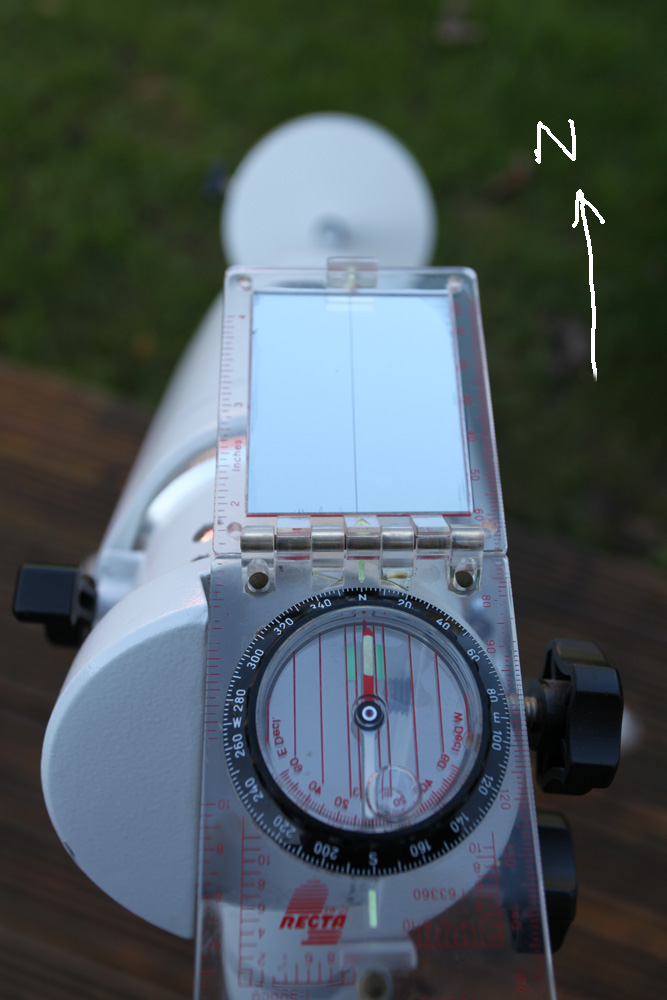
Next step is to confirm the mount is pointing north – you will need a compass for this.
And it is just a case of moving the tripod legs backwards and forwards until the counterbalance shaft and weight (if fitted at this stage) is pointing due north as in the photo below.

Next thing you want to do is to find out your Latitude and Longtitude. You can get this from various places – car satnav, applet on smart phone and of course – the internet.
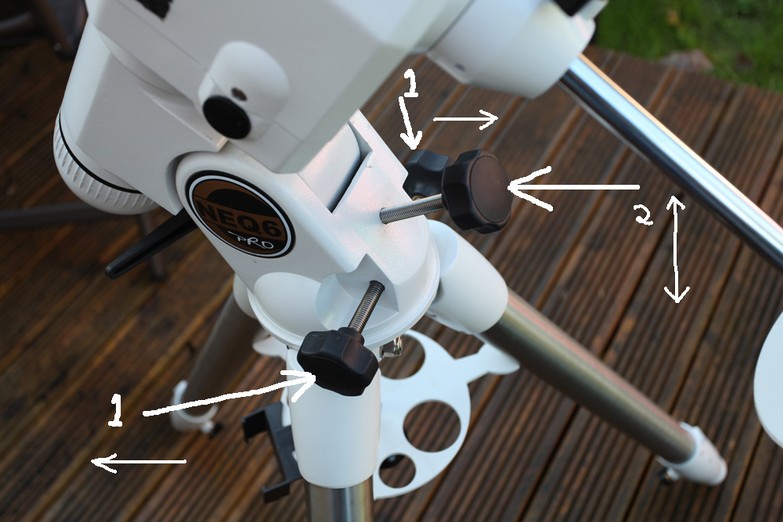
All you are doing at this stage is setting the mount up to approximately your latitude – in the example below it is roughly 52 degrees. You set this by using the two bolts as displayed in the picture. These work against each other so while you are adjusting them do not overtighten (the supplied bolts from the manufacturer have been known to bend and break).
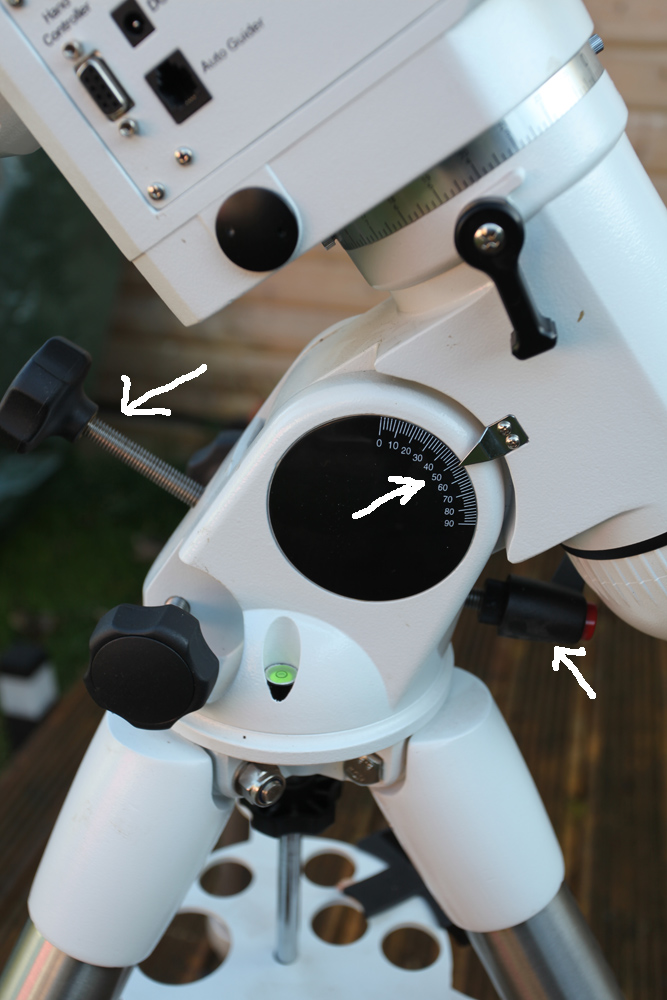

The reason for doing these previous two steps “roughly” is so that when you look through the polarscope, Polaris should be visible somewhere within the reticule.
Right – that is a start but this is where the magic really begins. Thanks to Mark, the next steps I completely overlooked so I can assure you the next part is very important indeed. You need to level your scope !!
The first step involves the Declination leveling.
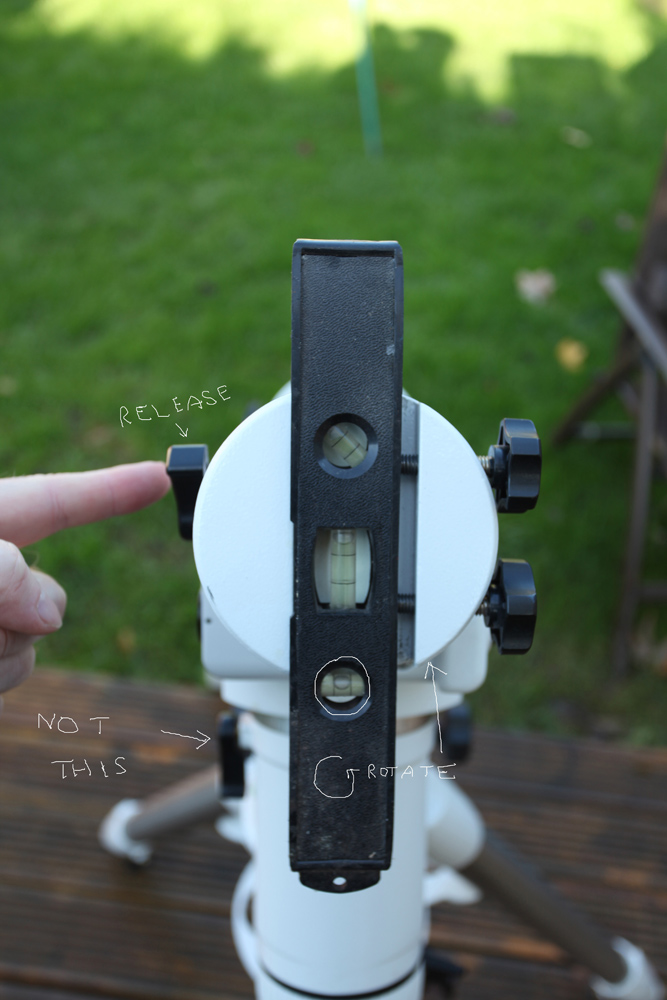

Put your spirit level in the mount dovetail bracket and make sure the base of it is flush with the recess. Tighten gently just to secure.
Do not adjust the RA lever at all for the moment.
Release the Declination lock level as shown in the picture and rotate the shaft clockwise or counter clockwise until the spirit level indicates it is perfectly parallel to the ground.
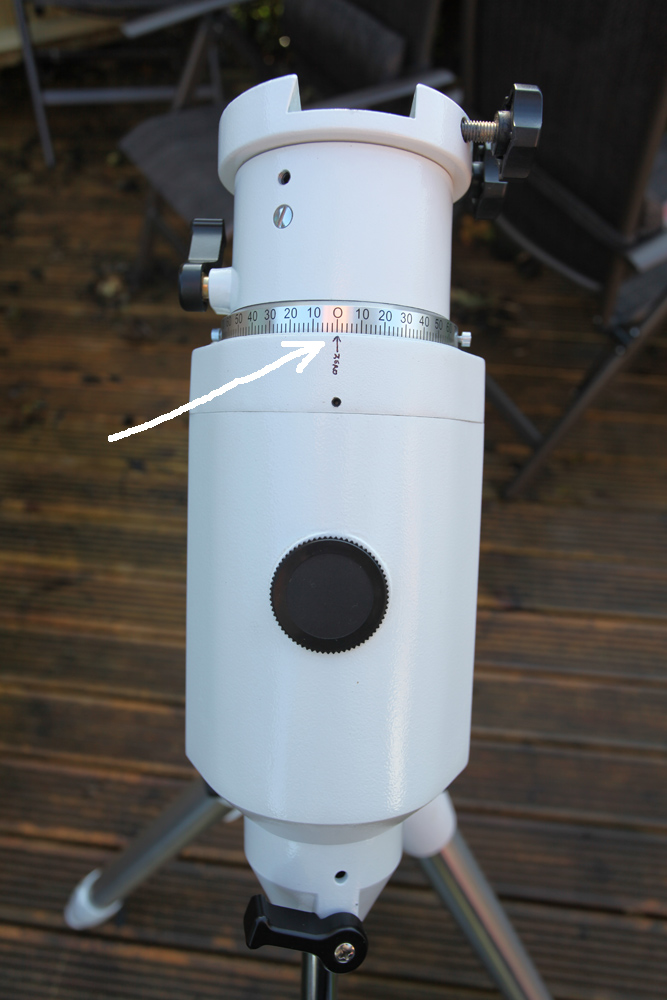
Now what I did (as suggested by Mark) is to use a marker pen and mark an arrow just by that black grub screw then release the screws on the dec scale and set it at zero exactly as indicated in the photo below. Tighten the screws – you should not have to do this again. (see photo below)

Next step is the RA leveling.
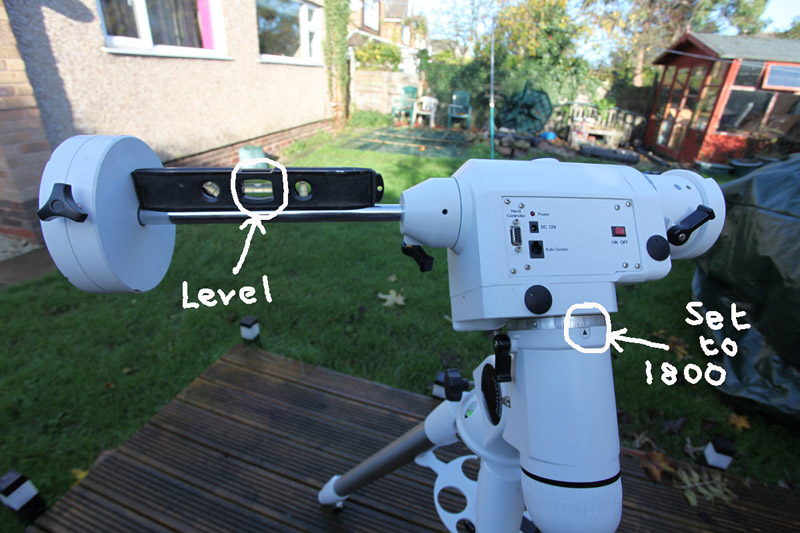

Extend the counterweight bar as you will be placing the spirit level on this to achieve perfect level.
Release the RA lock level as shown in the picture and rotate the RA slowly upwards until the spirit level indicates it is perfectly parallel to the ground. Once it is level, tighten the RA lever then loosen the RA calibration scale and rotate until 18 matches up to the black triangle. Tighten the screws – you should not have to do this again. (as in the photo below)
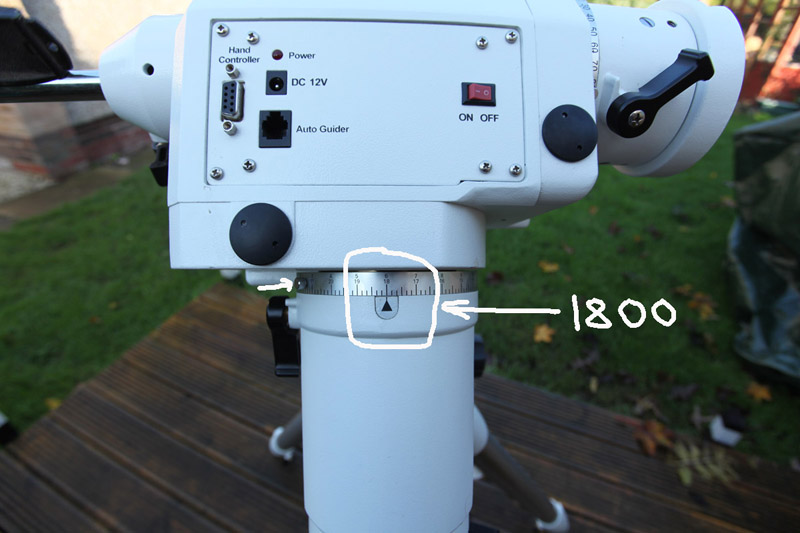

For the final part, release the RA lock as indicated on the photograph below and rotate the RA until 1200 is lined up against the triangle. Then again, I used a marker pen and mark an arrow just by that black grub screw and wrote 1200 (personal preference) on the mount.
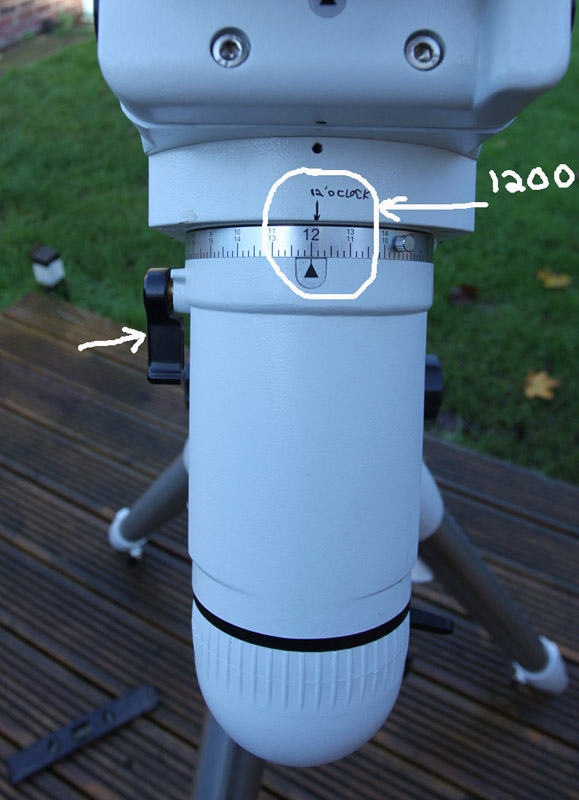

Ok, we now have a balanced scope and this is what is also known as the “Home Position”
As well as having a balanced scope, all the steps we have done so far is to have the mount point approximately to the north and at a declination somewhere close to Polaris. Now we have to unscrew that plastic cup in the above picture to reveal the polar scope as in the picture below.
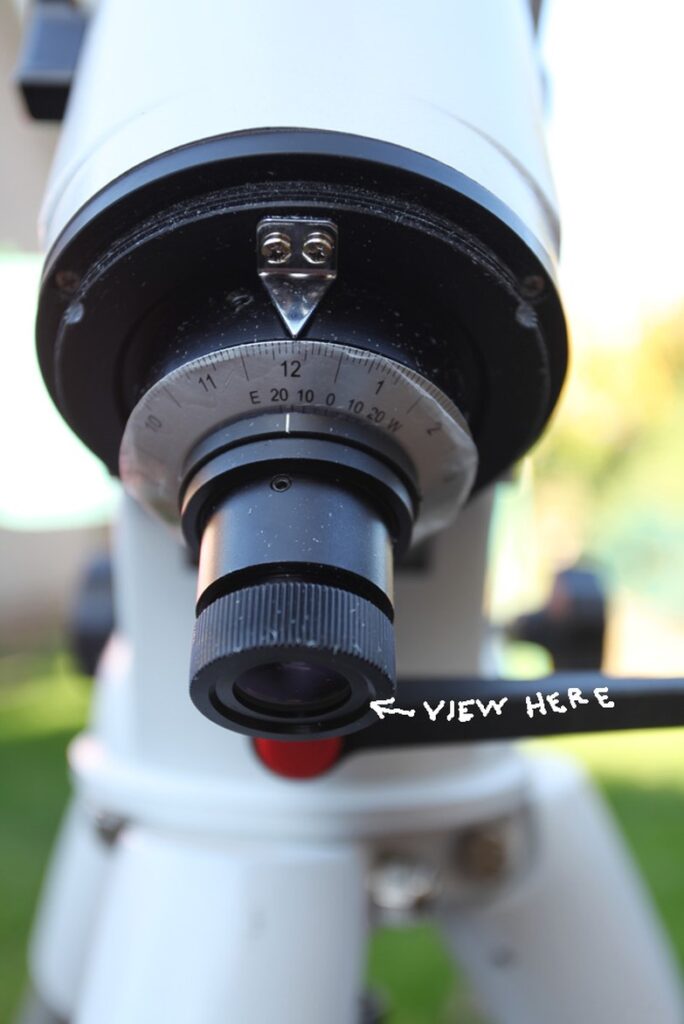

So many guides say so many things but it is what works for you in the end that counts. I have mainly ignored the scales and find alternative tools to help align and this is by far the easiest for me and I have found it works very well.
This next step involves using the Polar Alignment app mentioned at the beginning
This fabulous program works in conjuction with your polarscope and shows you where Polaris should be for a given time and date relative to the image you see looking through your polarscope. ie the transit.
To use the Polar scope you need to unscrew the base cap as indicated above and also remove the cap on the mount. You then have to rotate the Dec shaft through 90 degrees so that you can look through the hole in the shaft as in the photo below – otherwise you will see nowt because the shaft will be in the way.
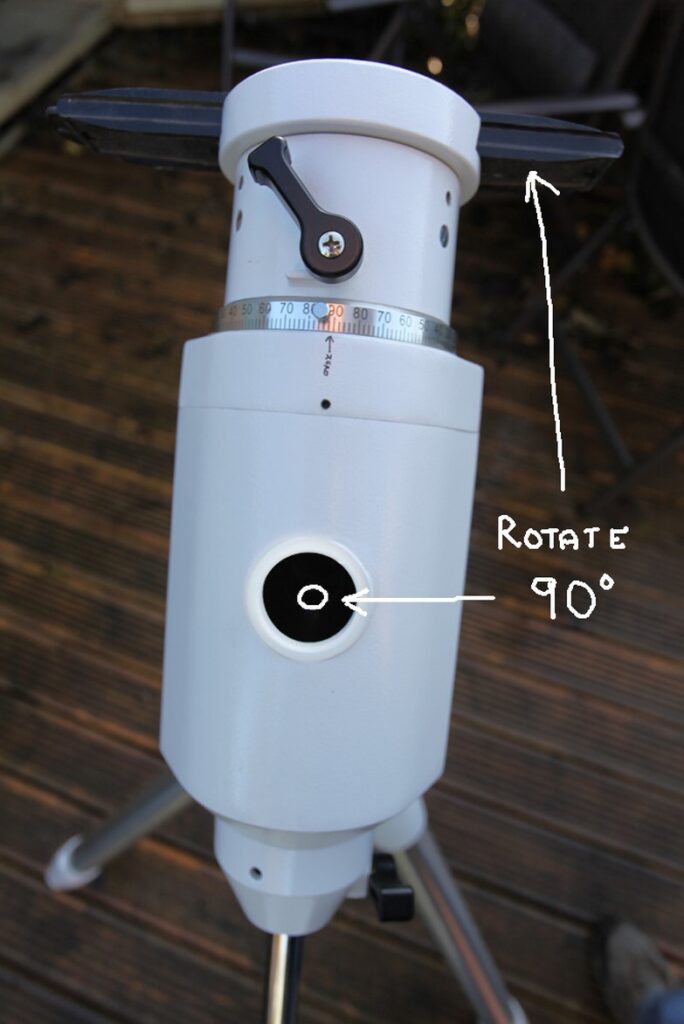

Next step is to rotate your RA to the approximate position given by Polarfinder as in the image below.
For northern hemispheres such as our own, the big dipper and Cassiopeia would be observed in the sky in approximate position as indicated in the Polarscope example below. Do not worry that you cannot see either of these constellations in the polarscope it does not matter. The main thing is to rotate the RA so the Polaris on the graticule matches what is being reported by Polarfinder.
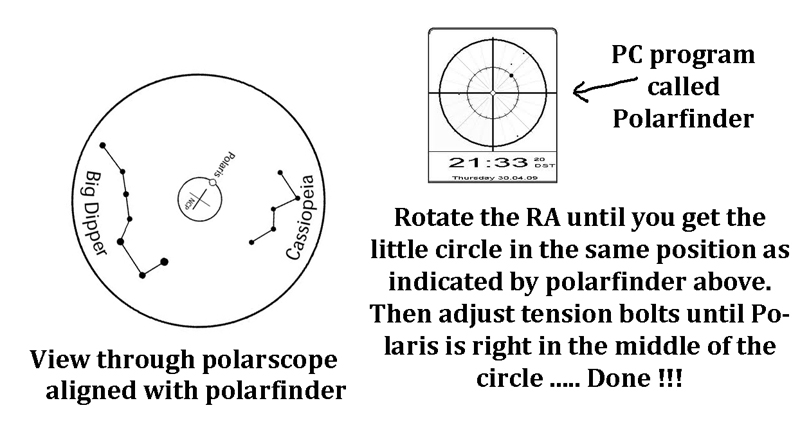

Then as shown in the photograph below, just use the adjustment bolts for “fine tuning” to bring Polaris right into that little circle. Remember, you are adjusting these bolts while looking through the polarscope.
Adjustment bolts 1 are left and right while 2 is up and down. Once this is done make sure your bolts are fairly tight. But remember, tight is tight but too tight is bust !!

Now release the Dec lock and RA lock and put your mount back to the home position then tighten these two locks up you will not have to adjust your mount physically again for the evening. Unless of course you kick it, have the dog bump into it or move it in any other way.
Congratulations, you are now Polar Aligned.